Well I selpt at 2 in the morning yesterday.. got only 4 hrs of sleep for sch. was building the Hotchkiss from the company Trumpeter.
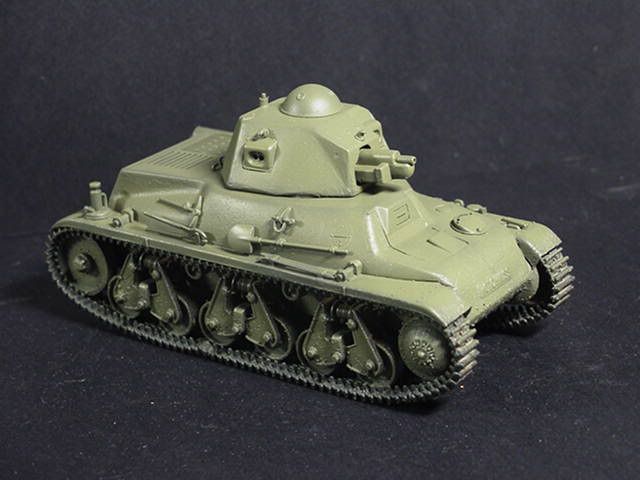
Here's the first few looks at it.
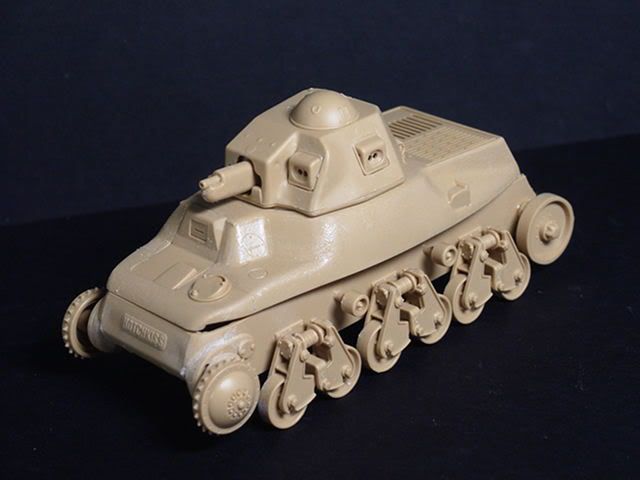
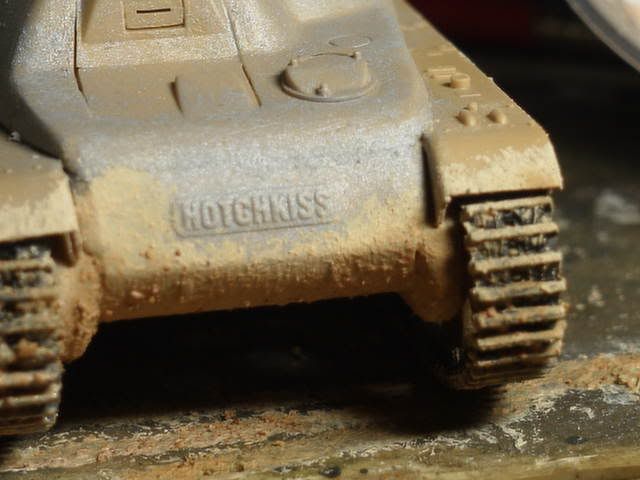
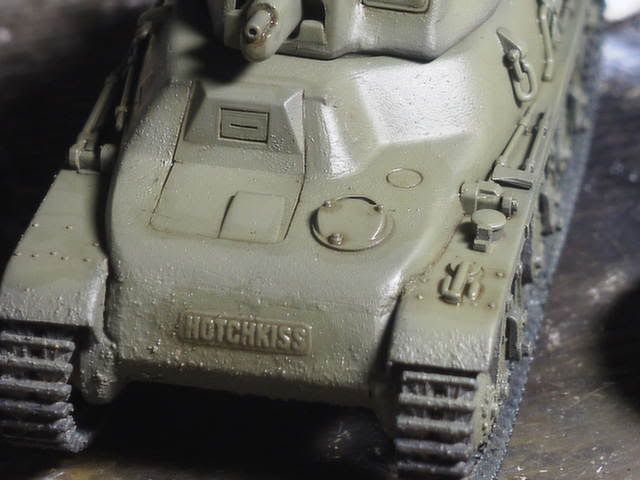
oo aaa .. ive done some texturing here and here on the hull body. The tracks are not on yet (crap i messed another track up again!! zz now i need to spend another SGD$50 just to get new tracks... but hey.. this time it wont be the rubber-band type but rather metal tracks with BETTER details... yeah u modelers guessed it... Friulmodel....)
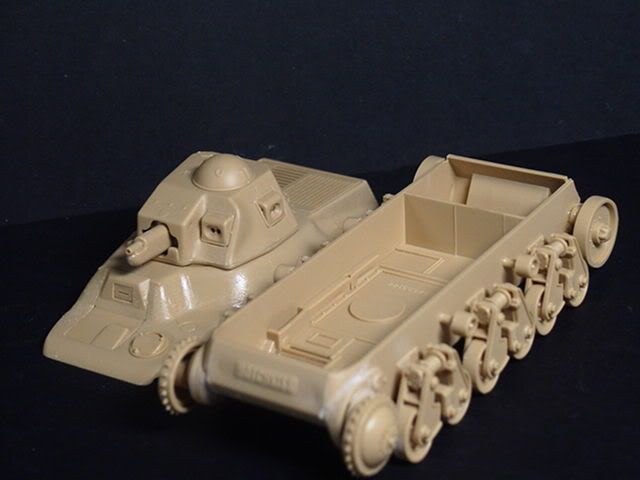
Trumpeter included VERY basic interiors for this tank but i left it out since it's gonna be all buttoned-up.
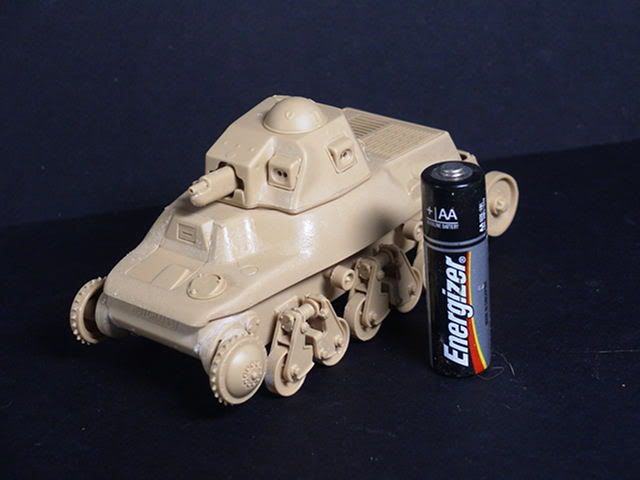
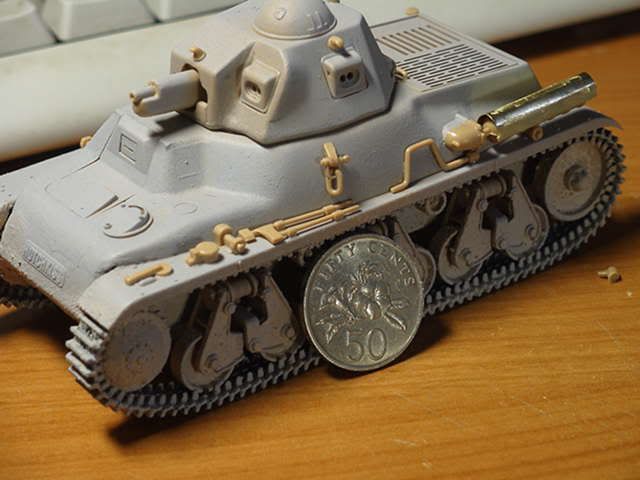
Here's a comparison with a normal (are there abnormal ones?) AA sized batt. yeah... this is by far the smallest tank ive made in 1/35th scale. Song bo~~
And to think that Trumpeter packaged this kit in a HUGE HUGE 50 cm by 30 cm by 6 cm box. I opened the box up expecting to find some nice little extras thrown in or sth but nah.. all i found was the little 10cm long hull and the usual set of sprues. OMG this tank is as big as my phone zzz...

Now we compare to the CHi Ha. Yeah it is small. BTW the fitting of the Hotchkiss was average. A few filling up and shaping to do here and there and some fiddling with the wheels and i messed up the idler (dang i hate roadwheels now) but managed to put it back together again (with all the king's horses and all the king's underwear.)
Wht's left now is rather simple.. simple little tiny details like handles and hooks and tools stuff like that. Im lazy.... those things are TINY!! i just came home from school and this and that (wootz luckily i have my little laptop to play BF42 on in the train to keep my entertained. 40 minutes of pure gaming in the train.) So yeah i was saying... i'll finish p eveyrthing after a little nap.
Oooo and now that i'm an art student..... i now have a good reason to buy PAINTS!!!! muahaha!!!! acrylics.. oils... Grouche... pastels.... charcoal... pencils... wahhahaa i'm really enjoying all these..... Then soon comes all the balso wood and plastic cards and stuff.... :)
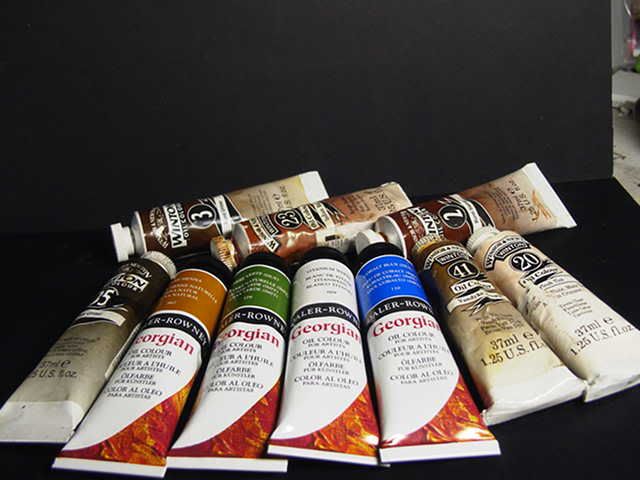
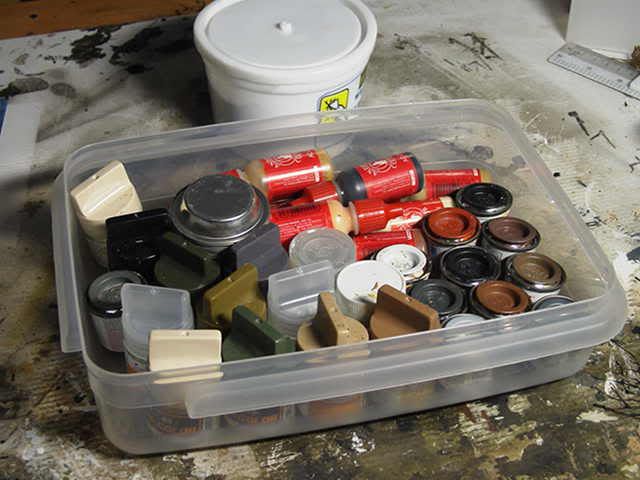
My collection of oils so far... pathetically, i just bought something out of the colour hues of brown after 2 years of using oils. Give me one semester (4 weeks) and you'll see many mmore colours packed NICELY on my walls. Then maybe a painting or two.
Mixture of water-based paints and enamels and acrylics and stuff... basically all are for modeling.... nt art class... I'll run out of paint after the first two strokes of the paintbrush in class.
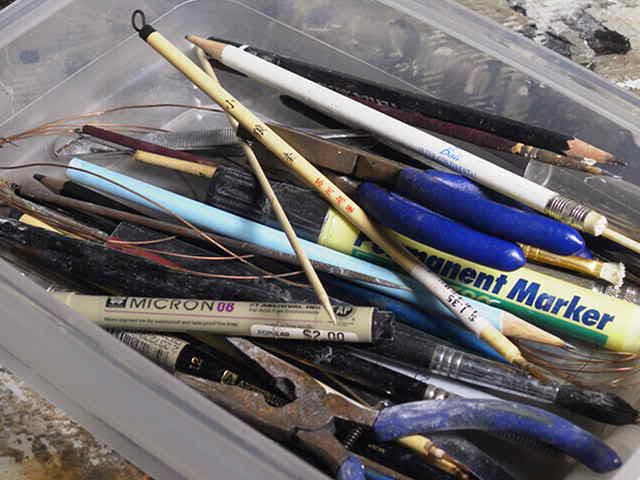
TOOLS.... yeah can never model without all these "junk"
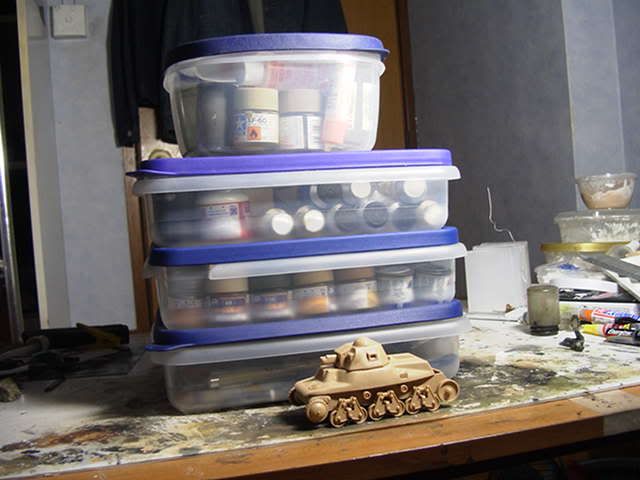
My entire set of tools and paints needed for modeling. nice? and that pathetic looking French...
Guess what? it's the end of the post! lolz~!!! as Clara would say... lmaO~
Anyways as i was saying.... there's this girl in class (no im nt after her)... her dad runs a model shop!! ehh she said its in the building opposite Plaza Singapura near Heeren. She left me confused. Firstly... there's a building infront of Plaza Singapura?!!? Secondly... Heeren and Plaza Singapura are so far apart there are LOTS of buildings in between them!!
Ah well... maybe i'll run over to her daddy's shop (and get discounts) if Bernard kicks me outta his shop (most probably from surfing too much internet in his shop. And the occasional fish-eye-model-staring.)
My bed calls me....
....and the room smells like glue and thinner.
Yes i'm a glue-sniffer. :)
------------------------------------------------------------------------------------------------------------------------------------------------------------------------------------------------------------------------------------------------------------------------------------------------
15 HOURS LATER
OMG last night i just realized i slept too early... i think it was about 8. Vis called me (thus wakin me up) at 930pm and said,"Eh Audi... i'm coming home from school now... wanna go eat anot?"
wahaha siao (crazy) i just woke up one lor then late liaoz (i was feeling groggy after waking up and furthermore it was quite late into the night for dinner).
So anyways I didnt go back to sleep.. played around with my comp.. finally talked to CLARA CHAN HAW LING on msn... kinda like our Happy Hour... though it normally stretches till 4 in the morning. Today it stretched till about 630am. In between i got the little Hotchkiss together and took some pictures too... oo eveyrone loves pictures...

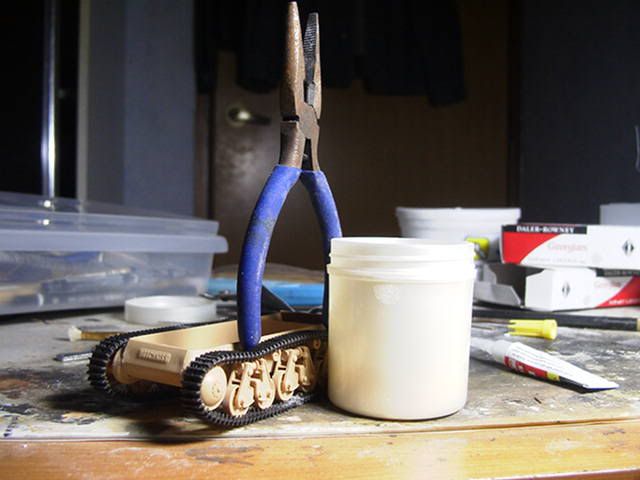
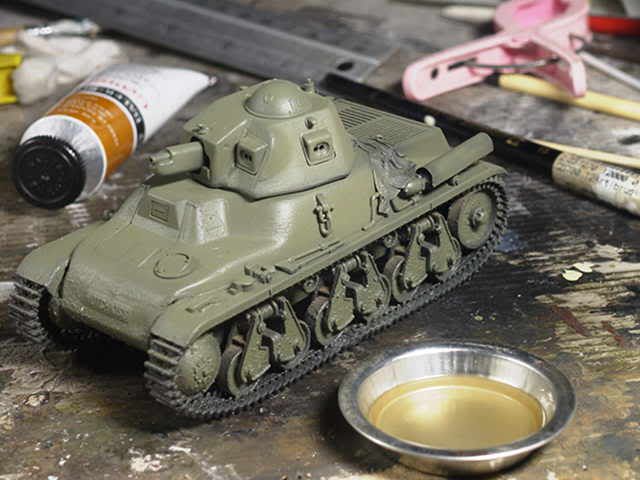
Today i shall share with u a method for filling in gaps on models. yeah even Tamiya sets need some filling up here and there. Some would prefer gettin putty into those gaps then wait for it to dry (frm a few hrs to a couple of days) and then sand it down. Bernie.. uh... sorry... Bernard.... doesnt like this method so he came up (or found) with this method.... this method... dries instantly.... is clean... doesnt smell.... and we only need superglue, small brush.... a pin... and finally.... BAKING SoDA....
basically we need the baking soda to like u noe.. eat when we're hungry.
So firsly we use those pins and get some superglue into thos gaps. then we use the brush and apply the baking soda onto the superglue. There... now its ready for filing. What? YES!! that simple! :)))))). i think the superglue/baking soda combination is superb. baking soda acts as an accelrator of superglue therefore making it cure instanly. INSTANTLY.. not ten seconds... INSTANTLY. Must be some chemical reactions happening in there. So there u have it non-modelers.. use this combination to quickly bond to things STORNGLY (believe me its damn bloody strong) with superglue. So now u noe wht to use to keep Little Johnny asleep.... The eyelids/baking soda/superglue combination works perfectly.
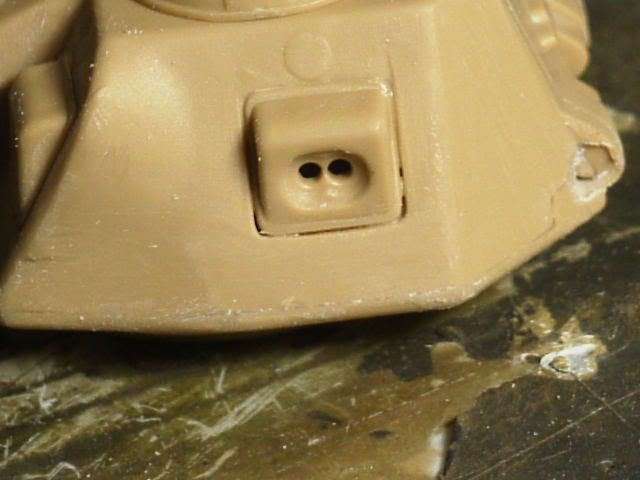
okok then we just sand it down bla bla bla u noe the drill.
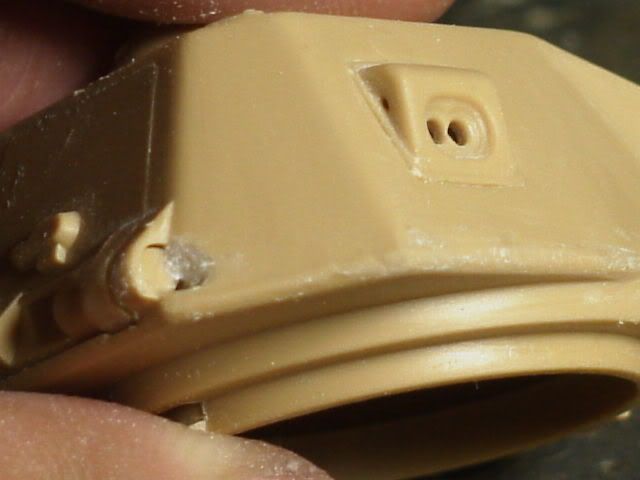
Another pic.
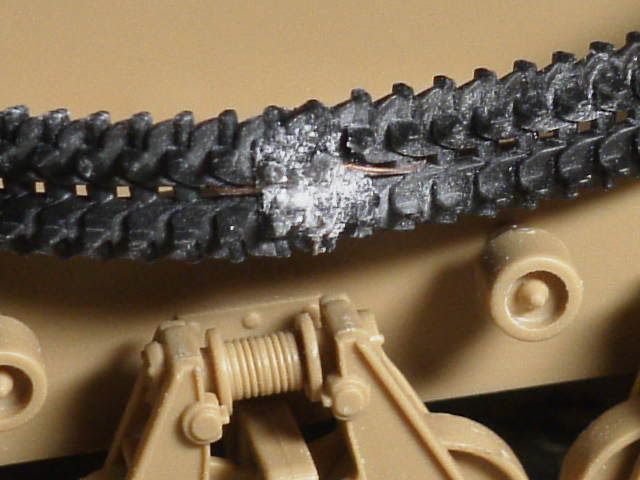
rememebr i messed the tracks? yeha the original tracks were too long. so i cut it. found out it was still a bit too long. cut it... perfect. then i found out my idler wheel was sticking out of the track line zz.... so i did this and that modifications, screwed the thing up... finally got it tpgether.... and now i found out the new position was further back (but correct) than usual so i found out my perfect length track was too short. zz... mended it with the superglue/baking soda (super soda =p or baking glue =p=p=p) combination.
bernard knew the tracks were long so he asked me to cut it here and there use staplers (i used copper wire to tie it together instead) and hide the messy work with mud. great idea.
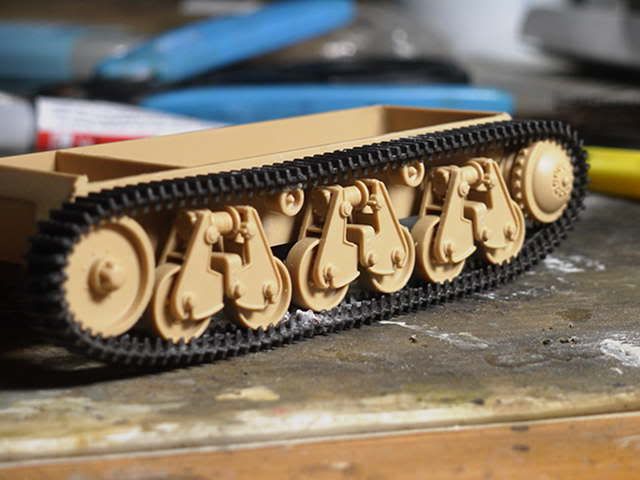
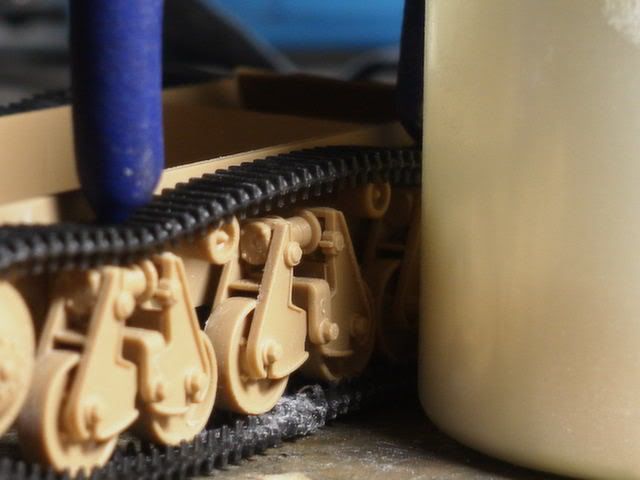
but firstly we gotta get that "sag" in those tracks otherwise they'll be floating. Picture explains itself. looks stupid...
Superglue rawks....
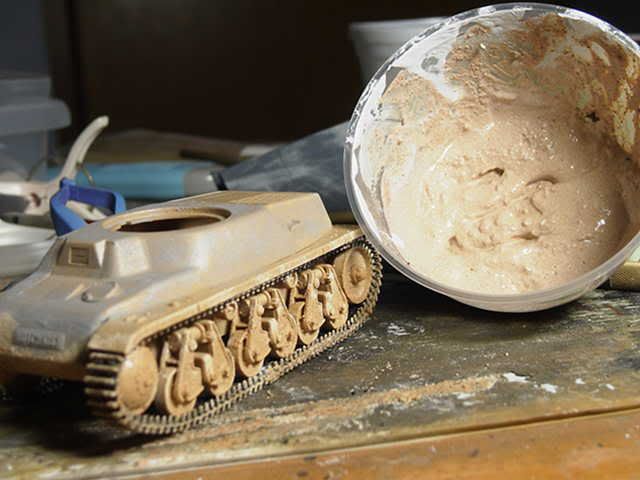
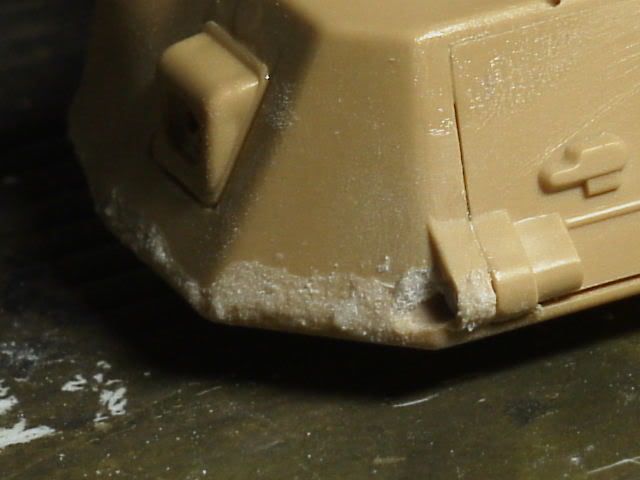
MUD~~!!! yeah used my usual plaster/water/sand mix. these were leftovers from the Type 97 actually... made a bit too much....
hmmm now to the finer details....
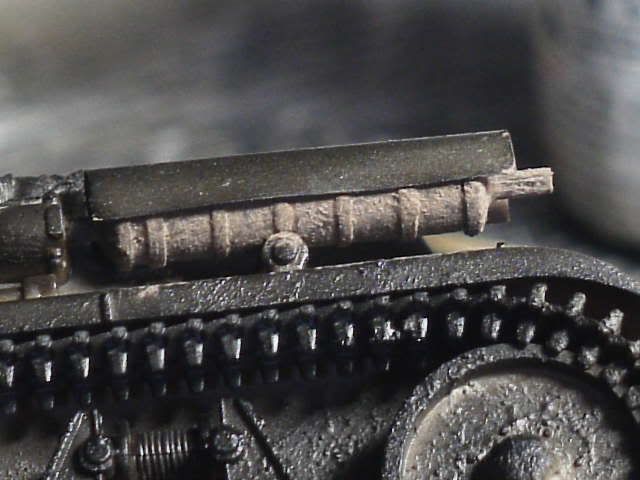
The kit offered a plastic exhaust cover for the... exhaust. hmm but i wanted to try a little scratchbuilding (and i had enough of plastic for the morning) so i fashioned out a cover using brass sheets~~!!! wow its like my first time using them and wht the toot they are hard to bend~!!
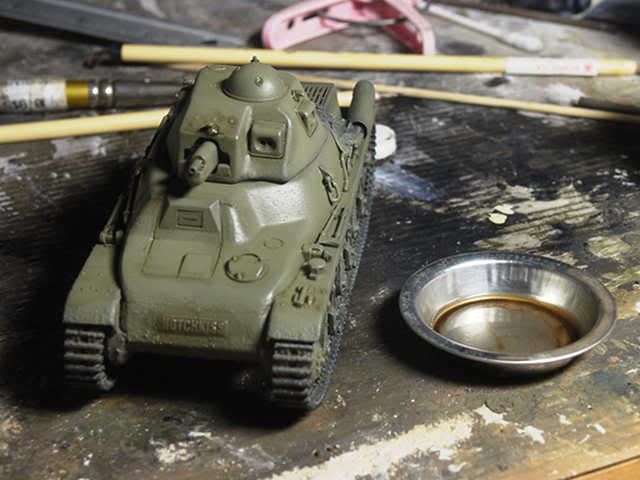
There ya go you little French.

details details...
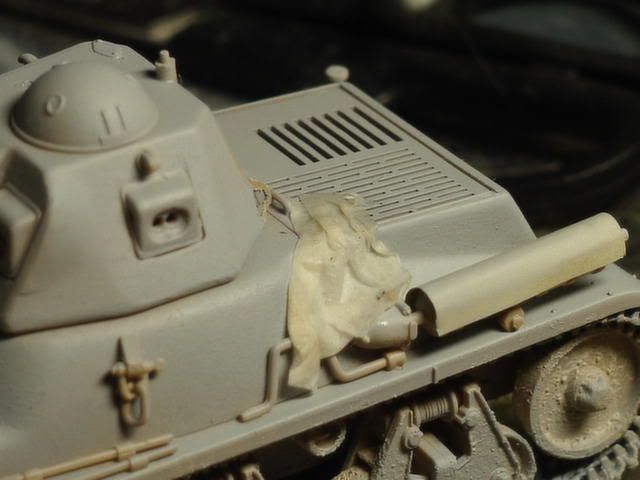
And now for my favourite.... FABRIC~~!!! fashioned the usual way. except this time i changed the brand of the tissue and they had thinner sheets....
PAINTING BEGINS~~~!!!!
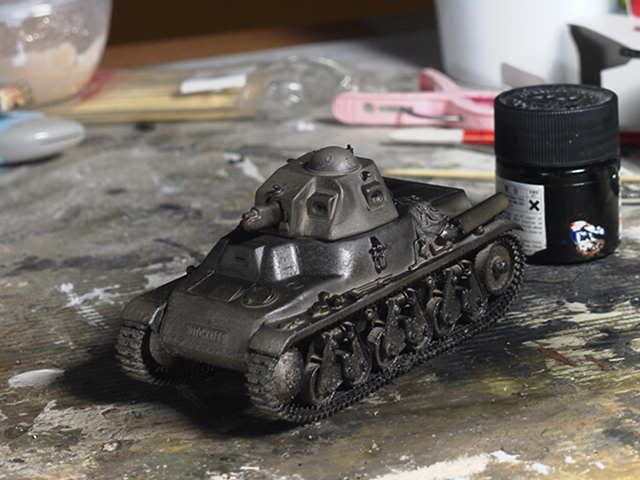
BLACK!! preshading method again for this baby. Sorry... this French. LOLZ.
I didnt wanan spend soo much time on super-detailing this tank cos zz i really have no knack for all these... I'm more of the painting guy u noe...

Well that's it.... now its time for a little rest and maybe have lunch with Clara.... (not her again~~!!) That's provided she aint sleeping.... once she sleeps she turns into a rock. Cold and course.. LOLZ
ok ok coffee break's over get back to work. Or as Bugs Bunny would say, "Get back to woirk!"
---------------------------------------------------------------------------------------------
---------------------------------------------------------------------------------------------
---------------------------------------------------------------------------------------------
SIX HOURS LATER
oh god i have been modeling since.. hmm 4 am... to 6 pm... that like... 14 hrs. non stop. no sleep. no wait... then lets add the time i was modleing before i slept.. hmm 18 hrs~~!! zzz
ok k the French is almost done... still have chipping to do and mud. I kinda screwed up (again).
There were a few technical problems and im nt that much of an engineer.
Paintjob wasnt tops this time. things went wrong... green was gay.... wood colour was weak.... paint wont mix.... brushes just split open... was a day of infamy. and worse of was my hands were shaking. Shaking as in REALLY shakin~~!!! i dunno if im very tired or the smell of thinner has finally got to me.
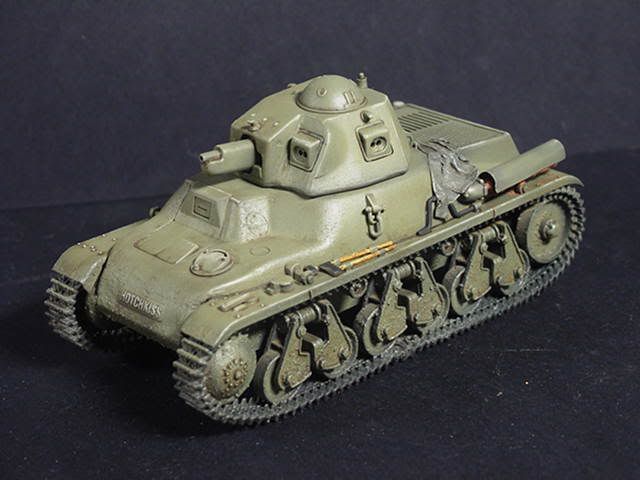
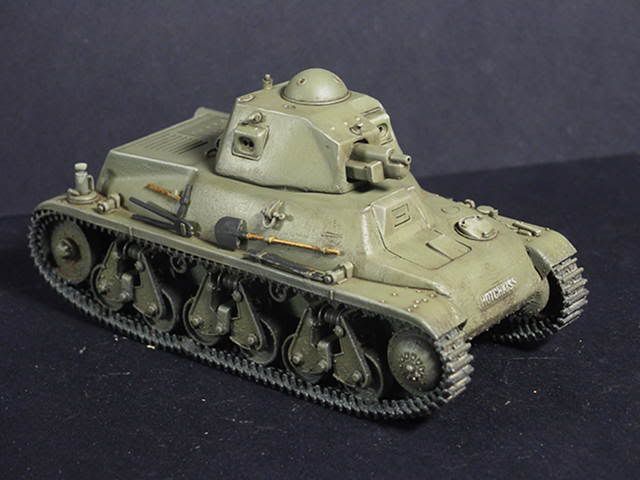
Anyways yeah here u go... the pictures....
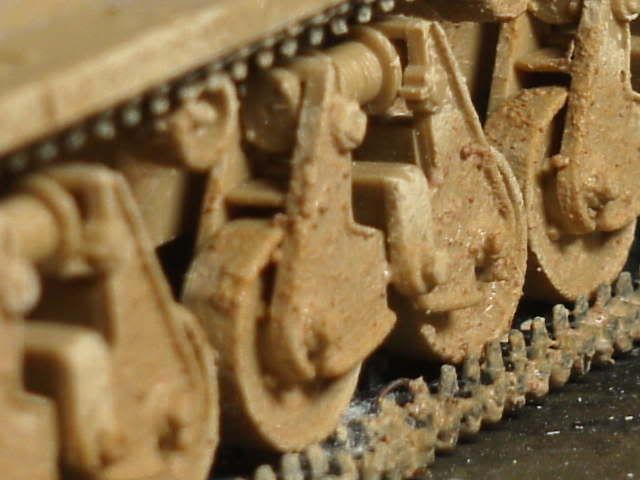
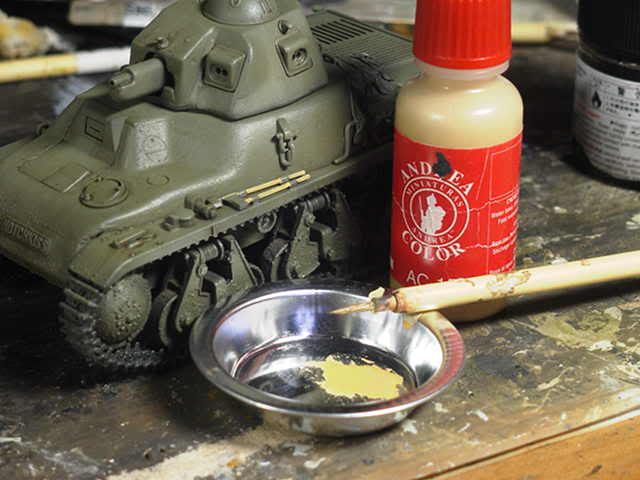
Finally got proper techniques for rust texture. a simple mix of pigment powders and isopropyl alcohol dabbed onto the surface. simple as that.
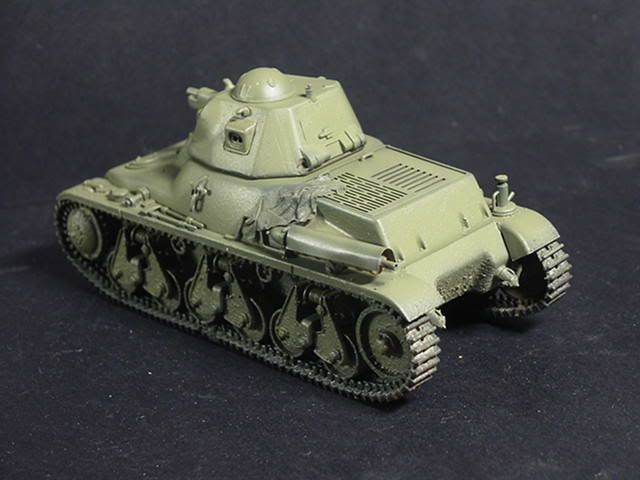
Green was recycled form the Type 97 with a little extra bits of colours added. Notice that my pre-shadin method went nuts. Where's the darker shade?!!??! Toot-ing airbrush!!
Tis time round i applied a raw sienna filter. Blargh wht am i saying... i used raw sienna as filter. wanted to depict a warm and dry environment. The bottom half of tank has been filtered whereas the turret hasnt. is there even any difference??!! ahh well its the thought that counts.
General wash.. pin point wash... the usual... havet done any rain marks yet (i forgot). Dang... the hull is too plain~~!! there are no nooks or crannies or even bolts for rain marks to sensibly appear from! Ah well the turret might have some..
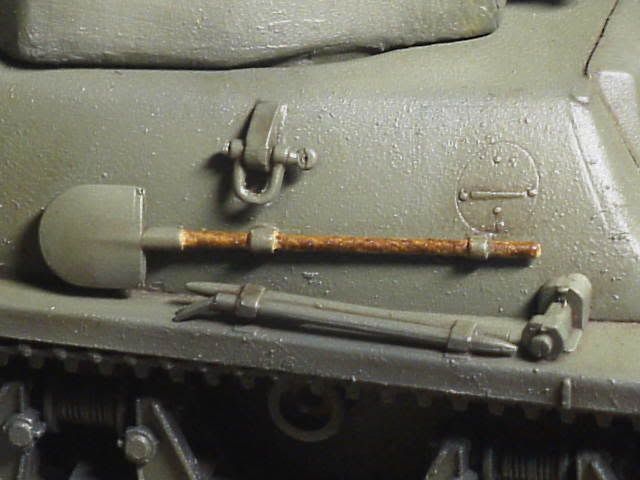
Wood was painted the usual way... kinda screwed tt up too... hands were shaking and eyes were getting blurry and dry...
This part got me smiling. i love it...
Wood... wood? that's wood?


The model in its current state now (at least for about a few hrs....). Im thinking of depicting a captured Hotchkiss so im still deciding on how to apply the Balkenkraus mark.
My tanks would never go anywhere without their blankie....
So yeah.. almost there..... i need a walk.... or at least a meal...
Here's the first few looks at it.
oo aaa .. ive done some texturing here and here on the hull body. The tracks are not on yet (crap i messed another track up again!! zz now i need to spend another SGD$50 just to get new tracks... but hey.. this time it wont be the rubber-band type but rather metal tracks with BETTER details... yeah u modelers guessed it... Friulmodel....)
Trumpeter included VERY basic interiors for this tank but i left it out since it's gonna be all buttoned-up.
Here's a comparison with a normal (are there abnormal ones?) AA sized batt. yeah... this is by far the smallest tank ive made in 1/35th scale. Song bo~~
And to think that Trumpeter packaged this kit in a HUGE HUGE 50 cm by 30 cm by 6 cm box. I opened the box up expecting to find some nice little extras thrown in or sth but nah.. all i found was the little 10cm long hull and the usual set of sprues. OMG this tank is as big as my phone zzz...
Now we compare to the CHi Ha. Yeah it is small. BTW the fitting of the Hotchkiss was average. A few filling up and shaping to do here and there and some fiddling with the wheels and i messed up the idler (dang i hate roadwheels now) but managed to put it back together again (with all the king's horses and all the king's underwear.)
Wht's left now is rather simple.. simple little tiny details like handles and hooks and tools stuff like that. Im lazy.... those things are TINY!! i just came home from school and this and that (wootz luckily i have my little laptop to play BF42 on in the train to keep my entertained. 40 minutes of pure gaming in the train.) So yeah i was saying... i'll finish p eveyrthing after a little nap.
Oooo and now that i'm an art student..... i now have a good reason to buy PAINTS!!!! muahaha!!!! acrylics.. oils... Grouche... pastels.... charcoal... pencils... wahhahaa i'm really enjoying all these..... Then soon comes all the balso wood and plastic cards and stuff.... :)
My collection of oils so far... pathetically, i just bought something out of the colour hues of brown after 2 years of using oils. Give me one semester (4 weeks) and you'll see many mmore colours packed NICELY on my walls. Then maybe a painting or two.
Mixture of water-based paints and enamels and acrylics and stuff... basically all are for modeling.... nt art class... I'll run out of paint after the first two strokes of the paintbrush in class.
TOOLS.... yeah can never model without all these "junk"
My entire set of tools and paints needed for modeling. nice? and that pathetic looking French...
Guess what? it's the end of the post! lolz~!!! as Clara would say... lmaO~
Anyways as i was saying.... there's this girl in class (no im nt after her)... her dad runs a model shop!! ehh she said its in the building opposite Plaza Singapura near Heeren. She left me confused. Firstly... there's a building infront of Plaza Singapura?!!? Secondly... Heeren and Plaza Singapura are so far apart there are LOTS of buildings in between them!!
Ah well... maybe i'll run over to her daddy's shop (and get discounts) if Bernard kicks me outta his shop (most probably from surfing too much internet in his shop. And the occasional fish-eye-model-staring.)
My bed calls me....
....and the room smells like glue and thinner.
Yes i'm a glue-sniffer. :)
------------------------------------------------------------------------------------------------------------------------------------------------------------------------------------------------------------------------------------------------------------------------------------------------
15 HOURS LATER
OMG last night i just realized i slept too early... i think it was about 8. Vis called me (thus wakin me up) at 930pm and said,"Eh Audi... i'm coming home from school now... wanna go eat anot?"
wahaha siao (crazy) i just woke up one lor then late liaoz (i was feeling groggy after waking up and furthermore it was quite late into the night for dinner).
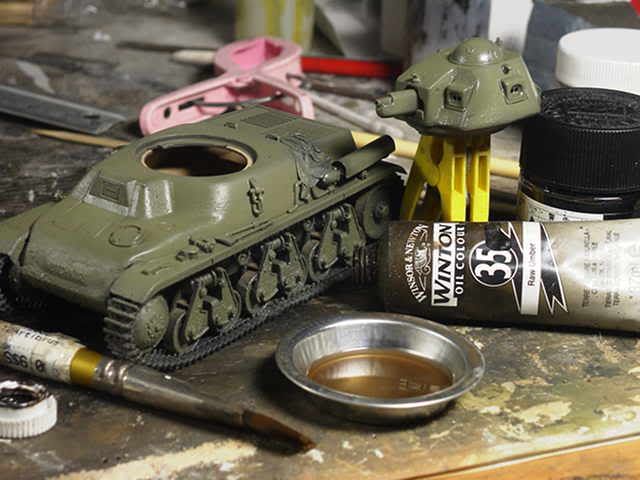
So anyways I didnt go back to sleep.. played around with my comp.. finally talked to CLARA CHAN HAW LING on msn... kinda like our Happy Hour... though it normally stretches till 4 in the morning. Today it stretched till about 630am. In between i got the little Hotchkiss together and took some pictures too... oo eveyrone loves pictures...
Today i shall share with u a method for filling in gaps on models. yeah even Tamiya sets need some filling up here and there. Some would prefer gettin putty into those gaps then wait for it to dry (frm a few hrs to a couple of days) and then sand it down. Bernie.. uh... sorry... Bernard.... doesnt like this method so he came up (or found) with this method.... this method... dries instantly.... is clean... doesnt smell.... and we only need superglue, small brush.... a pin... and finally.... BAKING SoDA....
basically we need the baking soda to like u noe.. eat when we're hungry.
So firsly we use those pins and get some superglue into thos gaps. then we use the brush and apply the baking soda onto the superglue. There... now its ready for filing. What? YES!! that simple! :)))))). i think the superglue/baking soda combination is superb. baking soda acts as an accelrator of superglue therefore making it cure instanly. INSTANTLY.. not ten seconds... INSTANTLY. Must be some chemical reactions happening in there. So there u have it non-modelers.. use this combination to quickly bond to things STORNGLY (believe me its damn bloody strong) with superglue. So now u noe wht to use to keep Little Johnny asleep.... The eyelids/baking soda/superglue combination works perfectly.
okok then we just sand it down bla bla bla u noe the drill.
Another pic.
rememebr i messed the tracks? yeha the original tracks were too long. so i cut it. found out it was still a bit too long. cut it... perfect. then i found out my idler wheel was sticking out of the track line zz.... so i did this and that modifications, screwed the thing up... finally got it tpgether.... and now i found out the new position was further back (but correct) than usual so i found out my perfect length track was too short. zz... mended it with the superglue/baking soda (super soda =p or baking glue =p=p=p) combination.
bernard knew the tracks were long so he asked me to cut it here and there use staplers (i used copper wire to tie it together instead) and hide the messy work with mud. great idea.
but firstly we gotta get that "sag" in those tracks otherwise they'll be floating. Picture explains itself. looks stupid...
Superglue rawks....
MUD~~!!! yeah used my usual plaster/water/sand mix. these were leftovers from the Type 97 actually... made a bit too much....
hmmm now to the finer details....
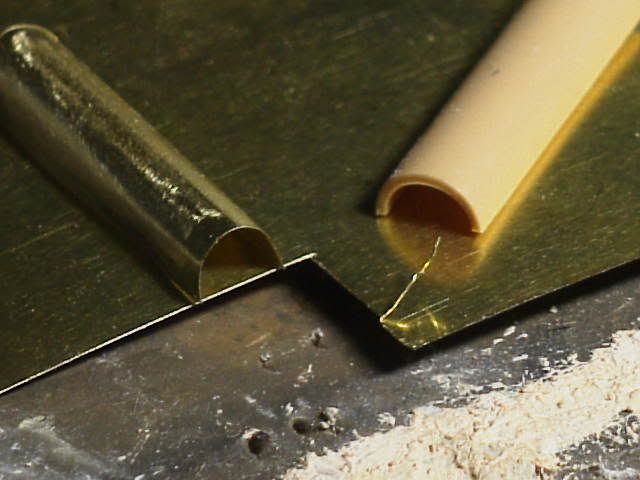
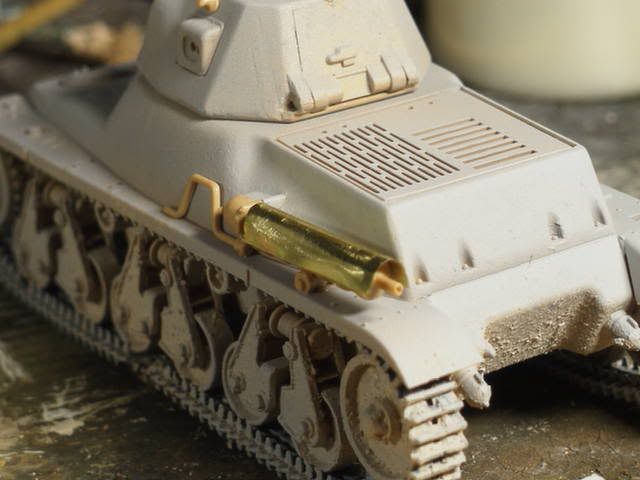
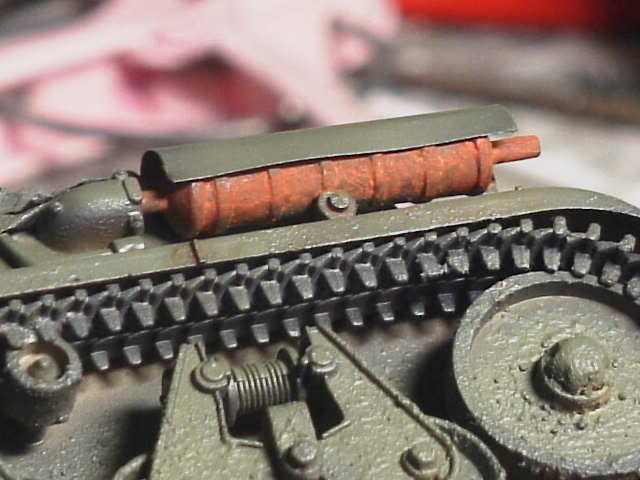
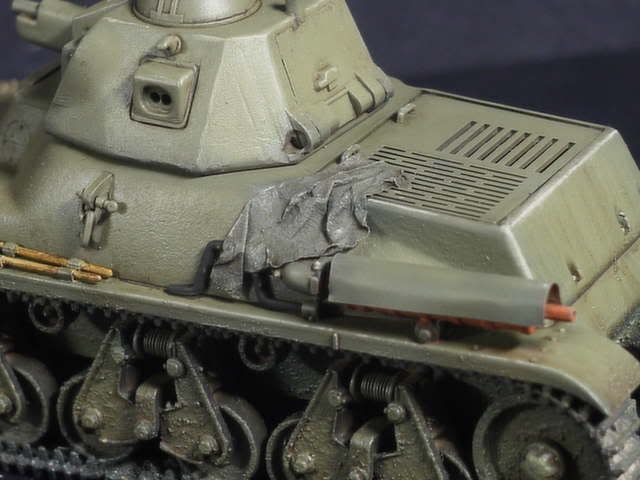
The kit offered a plastic exhaust cover for the... exhaust. hmm but i wanted to try a little scratchbuilding (and i had enough of plastic for the morning) so i fashioned out a cover using brass sheets~~!!! wow its like my first time using them and wht the toot they are hard to bend~!!
There ya go you little French.
details details...
And now for my favourite.... FABRIC~~!!! fashioned the usual way. except this time i changed the brand of the tissue and they had thinner sheets....
PAINTING BEGINS~~~!!!!
BLACK!! preshading method again for this baby. Sorry... this French. LOLZ.
I didnt wanan spend soo much time on super-detailing this tank cos zz i really have no knack for all these... I'm more of the painting guy u noe...
Well that's it.... now its time for a little rest and maybe have lunch with Clara.... (not her again~~!!) That's provided she aint sleeping.... once she sleeps she turns into a rock. Cold and course.. LOLZ
ok ok coffee break's over get back to work. Or as Bugs Bunny would say, "Get back to woirk!"
---------------------------------------------------------------------------------------------
---------------------------------------------------------------------------------------------
---------------------------------------------------------------------------------------------
SIX HOURS LATER
oh god i have been modeling since.. hmm 4 am... to 6 pm... that like... 14 hrs. non stop. no sleep. no wait... then lets add the time i was modleing before i slept.. hmm 18 hrs~~!! zzz
ok k the French is almost done... still have chipping to do and mud. I kinda screwed up (again).
There were a few technical problems and im nt that much of an engineer.
Paintjob wasnt tops this time. things went wrong... green was gay.... wood colour was weak.... paint wont mix.... brushes just split open... was a day of infamy. and worse of was my hands were shaking. Shaking as in REALLY shakin~~!!! i dunno if im very tired or the smell of thinner has finally got to me.
Anyways yeah here u go... the pictures....
Finally got proper techniques for rust texture. a simple mix of pigment powders and isopropyl alcohol dabbed onto the surface. simple as that.
Green was recycled form the Type 97 with a little extra bits of colours added. Notice that my pre-shadin method went nuts. Where's the darker shade?!!??! Toot-ing airbrush!!
Tis time round i applied a raw sienna filter. Blargh wht am i saying... i used raw sienna as filter. wanted to depict a warm and dry environment. The bottom half of tank has been filtered whereas the turret hasnt. is there even any difference??!! ahh well its the thought that counts.
General wash.. pin point wash... the usual... havet done any rain marks yet (i forgot). Dang... the hull is too plain~~!! there are no nooks or crannies or even bolts for rain marks to sensibly appear from! Ah well the turret might have some..
Wood was painted the usual way... kinda screwed tt up too... hands were shaking and eyes were getting blurry and dry...
This part got me smiling. i love it...
Wood... wood? that's wood?
The model in its current state now (at least for about a few hrs....). Im thinking of depicting a captured Hotchkiss so im still deciding on how to apply the Balkenkraus mark.
My tanks would never go anywhere without their blankie....
So yeah.. almost there..... i need a walk.... or at least a meal...
Posted by
Audi
Labels:
Scale Modeling
RSS